
Number 1 most FAQ lately? “How on earth do you get your hair up in a bun like that?” My dears, I’m here to help you out.
I’m sure you’re no stranger to the variety of fun bun hair tutorials that are floating ’round the fashion-and-beauty blogosphere lately (see The Beauty Department for several good ones if you have long hair). I’m a particular fan of Liz Stanley’s (Say Yes to Hoboken) sock bun tutorial as I’m still growing my hair out and needed, shall we say, a boost to my bun. Ha. But I found myself getting frustrated because the socks were a wee bit unwieldy; I couldn’t ever get consistent results despite liking how it looked when I finally did get it right. And keeping it all pinned together was, again, difficult. So when I stumbled upon the (terribly-named) hair donut (UGH) at Ulta one day, a lightbulb went on. Aha! Way easier than the sock!

While I have only ever seen them in real life at Ulta, you can find hair donuts (GAH! Again with the name!!) readily available online at Folica and other places. Google ‘hair donut’ and the options are endless both in size and in color. Don’t be confused when you order the size; to get the bun size like mine, I use the 3″ version. They come as big as 6″ which is ridiculously large. I like the Conair version (branded to be a “Ballerina Bun Maker”) because the material is pretty sturdy and holds up better than other ones I’ve tried, despite the fact that it’s brunette in color and clearly I am a blonde.
Let’s talk a minute about my hair so you can get an idea of what I’m working with in the photos below. My hair is ridiculously thick and you can see in the above photo that it’s now grown out below my shoulders. I can probably get the same result sans-donut if I tease it a LOT, but I like the consistency of the donut, so that’s what I’ll use ’til it gets long enough on its own.

Step 1: Get that hair UP! Think cheerleader as you pull it up in a high ponytail. Any type of thin hairtie will work. I use these. Adjust as necessary. I don’t want the ponytail to be too severely tight, so I usually adjust the strands around my face, and make sure that while it’s still sleek, it’s still a little bit full.
Step 2: Tease the living daylights out of your ponytail. This step is KEY. If you want it to have the thick, full-looking texture (similar to this now-famous girl, as seen at Alt Summit), you must tease it within an inch of its life. I use a bristle brush or a rattail comb to get the desired effect. I tease it so much that it can stand straight up on its own. Literally. I also like to tease my husband with it too. Erm, wait. That sounded weird. I mean I like to make him laugh with how funny my hair looks standing straight up. Ok, moving on.

Step 3: Add the donut. You basically put it on kinda like a scrunchie by pulling your ponytail through the donut. Then tease some more. Yes. MORE.
Step 4: Start to wrap your hair around the donut. Because of the donut’s scratchy texture, it should hold pretty well. Keep wrapping it around and tuck the ends into the base.

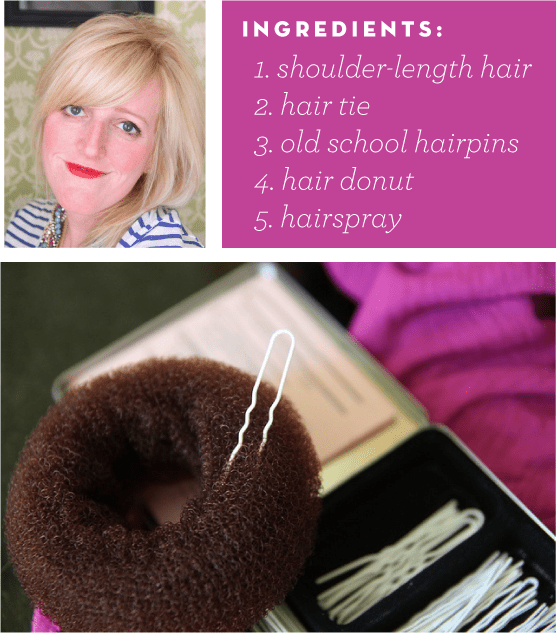
Step 5: Using your old-school hairpins (I like these by Bumble & Bumble), use them to hold the bun in place. Need an excellent tutorial? Check out Reagan Breinholdt’s hairpin tutorial here. You will never want to use another bobby pin again. I swear. Plus hairpins don’t hurt your head the way bobbies do.
Step 6: Smooth any stray hairs and you’re good to go!
Whaddya think? Are you rockin’ the fun bun these days?
You might also enjoy:
 What to do when you’re bored with long hair Posted in Style
 Hair Tutorial: Side Chignon Posted in Style
 How to Survive Growing Out Your Hair Posted in Style


