Over Halloween weekend, I finally got around to tackling a project that I’d wanted to try at the lake house. As you may remember, we had the entire house painted Benjamin Moore’s Decorator White, which is fabulous. No regrets there. But what I learned last year after painting the kitchen and living room white in our OKC house is that white forces you to get intentional about your decor really fast. Or otherwise it just falls flat. White’s not as easy of a choice as you might think!
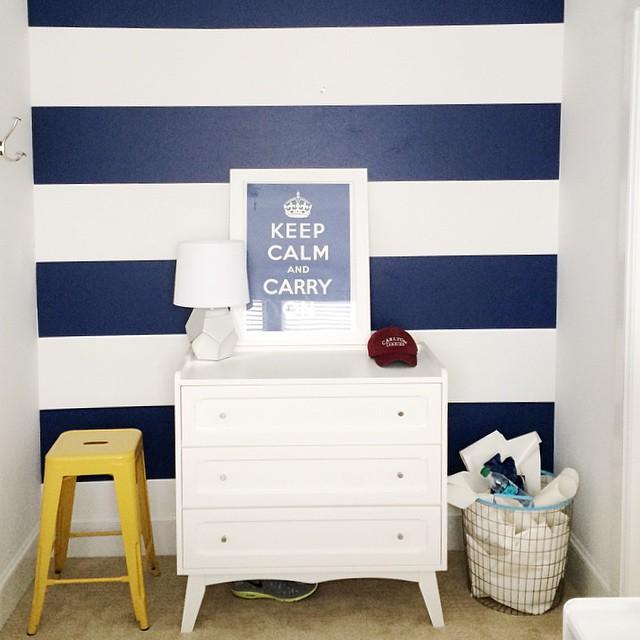
That being said, white is my favorite neutral because it pops against color so beautifully. I LIVE for color + white. Now, in the bedroom that we consider the “master” at Carlton Landing, there’s a funky little nook when you come in. In the original plan, it’s where the closet would have been, but to give more room, the builder chose to forgo a traditional closet space. And to me this was the perfect spot to test out a little DIY with vinyl.

I’ve had a ton of fun playing with vinyl ever since I got my Cricut. And you might remember the vinyl anchor decals I got from Walls Need Love for the loft. So after experimenting with vinyl around our OKC house, I ordered up fifty feet of Oracal 631 vinyl from eBay in 12″ width. Our ceilings are really high at the lake house, so I knew the stripe width was not going to be overpowering to the space. If you choose to do this project, make sure the vinyl you order is NOT the permanent kind. You will be sooooo sad! Oracal is the gold standard for good quality vinyl; I’ve tried the Hobby Lobby variety and was seriously disappointed in it. So go with Oracal. You can also find it in both matte and glossy. Keep in mind, though, that the matte will be far more forgiving to any flubs than the glossy.
First things first: measure off your stripes with a pencil. Start at the top and work your way down. You just want to give yourself a little marker to show where the top (or bottom, if you prefer) of your stripes should land so when you’re laying the stripes, they don’t end up going wonky. Like in this photo below. WONKY.
Once I started laying the vinyl, I started at the top, which was a mistake, since that was going to be the most visible stripe. Do a stripe closer to the bottom that won’t be as visible so you can work out your technique. Also, don’t be 27 weeks pregnant standing on a stool in your leggings while trying to do this. LEARN FROM MY MISTI learned with the first stripe to definitely overestimate how much extra overlap I’d need as somehow it ended up being too short (still not sure how this happened?). I found it easiest to work from left to right, slowly pulling the backing off the vinyl as I went. But to be honest, I don’t know that I’d try to tackle a space any larger than this little nook on my own because it was wicked hard at places. Doing an entire room sounds majorly overwhelming, but maybe just chalk that up to my hormones?
The good news is that this is a low-risk zero-mess project. Sick of it? No problem – just pull it up and you’re done. No drips of paint everywhere or having to do a lot of prior prep work. Keep an Xacto knife and a cork-back ruler on hand to cut the edges neat and clean. If you slip up and mess up the vinyl in some way, it’s ridiculously easy to patch up and with the matte finish, your eye will never catch it. I love how seamless the finished look turned out. I never would’ve gotten such a clean look with paint.
The stripes offer just enough of a pop to make the room feel more cohesive. I don’t know that we’ll keep the “Keep Calm” framed print there as it’s a wee bit on the small size. I’m also wishing I’d done the wider version of that dresser because it would’ve filled the nook better. But that’s how it goes – never a dull moment, and no project ever totally finished.