

If you’re looking for a quick & easy Christmas DIY that doesn’t cost all the dollars, then I have the craft for you! I love a beautiful boxwood wreath and a few years ago I splurged for this West Elm pretty (preserved boxwood). But it’s pricy for just a single item. But then last week I was at Trader Joe’s where I bought their 22-inch boxwood wreath for all of $10. TEN. DOLLARS. I mean, that is a STEAL, peeps.
Then I got this wild hair to disassemble the wreath and recreate this shot that I pinned a few weeks ago — the scandinavian simplicity and minimal greenery feels so fresh and clean this year, right? After a quick trip to Hobby Lobby for my supplies, I was able to make 7 – YES! – simple wreaths from the one Trader Joe’s boxwood. #craftmath I love making simple and pretty decorations like this; it’s gratifying without a lot of expense or time involved. And I think it’s a good DIY for older kids too.
Once it was said and done, I got 7 wreaths out of the deal for a grand total of $45.


FOR THIS DIY, YOU WILL NEED:
- Scissors
- BOXWOOD BRANCHES
- Wreath frame in any size
- Florist stem wire in green
- Optional: ribbon
A few notes on this before we begin:
You can pick any size wreath form; they come in a variety of diameters and shapes. And obviously you can make the wreath as full as you like, but I kept mine pretty simple on purpose. Feel free to use whatever greenery you choose – every clippings from your own yard will work beautifully!
STEP 1
Cut your boxwood pieces in lengths of about 8-10″. You don’t want them to be too skimpy, so keep them kinda fluffy.
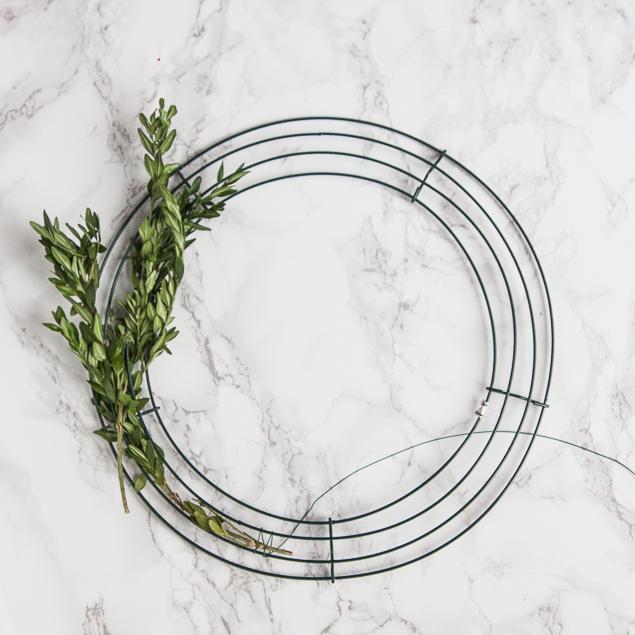
STEP 2
Begin weaving the boxwood branches into the frame and secure them with the florist wire. This, in my opinion, was the trickiest part, but once you get going it’s pretty easy to keep it under control. The wire is extremely pliable and you can easily bend it with your fingers. The main goal with the wire is to maintain the rounded shape of the wreath but also to contain flyaway branches so it doesn’t look unkempt. You’ll crisscross it over the frame several times; think of it kinda like sewing. When you get to the end of a piece of wire, wrap it securely onto the frame. (In the end, I probably used 5 or 6 pieces of wire for the entire wreath.)
STEP 3
Apply any other embellishments like ribbon and hang where you want. Voila!

This little wreath above was the first one I made, and I was all willy nilly with the direction of the branches. But for the rest, I made sure all the leaves were wrapping in the same direction.

Ok, I haven’t tried it, but if you’re interested in learning more about preserving your boxwood creations, check out Julie Blanner’s post on this very topic. I’m intrigued!
You might also enjoy:
 Christmas Home Tour (Part 1): Ginger Jars & JOY Posted in Celebrations, Our House
 DIY: Liquid Gold Leaf Posted in Interiors, DIY
 Copper Pumpkins: A semi-successful DIY Posted in Celebrations, DIY


