
We’ve now received another dumping of snow and I can now say that I’m officially over it. Valentine’s is swiftly approaching, but I don’t know how much celebrating we’ll be doing as school has been canceled for today, the scheduled day for Jude’s V-day party. 🙁 So, if I can’t share our Valentine goodies with his class, I’m going to share them with you all!
I saw this pretty photo over at Martha Stewart a few weeks back and I was amazed when I was that it was homemade hard candy. I was even more pleasantly surprised to see that the recipe appeared to be so simple. Making things like candy has intimidated me for some reason. Maybe it’s the high temperatures and a fear of being burned, but I realized that I had everything to make these except the flavorings and the gem molds themselves.

So I took Martha’s suggestion and bought 3 sets of molds for $3.50 apiece from FancyFlours.com, along with 3 different flavors to make my candies: cherry, strawberry, and cinnamon. Imagine my surprise when I opened the package yesterday and saw how teensy tiny those little flavor vials are!


Is it just me or do these food coloring bottles look like little gnomes? So cute.

Here’s the recipe, via Martha Stewart:
- 1 cup sugar
- 1/4 cup water
- 2 tablespoons corn syrup
- 1/4 teaspoon cinnamon extract or flavor of your choice (I did cinnamon, strawberry, & cherry, from FancyFlours.com)
- Gel-paste food coloring, such as Tulip Red, Orange, or Soft Pink (sugarcraft.com) (I didn’t use this. Just regular ol’ food coloring drops)
- Bring 1 cup sugar, 1/4 cup water, and 2 tablespoons corn syrup to a boil in a small saucepan over medium-high heat. Heat until syrup registers 300 degrees on a candy thermometer. (Note from me: this might take longer than you think it will. And this is also why it is imperative that you have a candy thermometer!) Remove from heat, and stir in 1/8 teaspoon cinnamon extract and 1 or 2 drops food coloring using a rubber spatula. (I used regular ol’ food coloring and I had to use more than I thought to get really rich, deep color) (Mixture will steam and bubble when liquid is added, so be careful.) Transfer mixture to a liquid measuring cup, and let the bubbles settle slightly, about 15 seconds. (I used my OXO measuring cups – get something with a spout so you can really control how much of the mixture gets into the molds. Act quickly so it doesn’t get too solid – it’s easier to pour when it’s hotter. Pyrex measuring cups would be good for this too)
- This note is from me, not Martha: Some commenters on this recipe noted that they had issues w/ the candies sticking in the molds and not popping out, so they recommended spraying Pam onto the molds. So I did this for the first round, and I was not pleased with the result; they were kinda cloudy and not very smooth on the top. For the second batch, I rubbed vegetable oil onto the molds w/ a paper towel, and they turned out perfectly. So I would recommend this method.
- Slowly pour mixture into gem candy molds (fancyflours.com) just below the top. (This part was hard for me, as you’ll see in the photos below. I almost always had a string of the mixture from mold to mold. Plan on putting at least one batch down as a trial run. Regardless, you can still get all those little stringy pieces off w/ a knife when you pop the candies out of the mold)Let cool until candies harden, about 30 minutes (this didn’t take this long for me. They hardened up pretty quickly). Remove candies from molds.
- In Martha’s recipe, they put the candies back to back to make fully 3D gems. I didn’t really particularly care about this, so I just left them as-is.
Here you can see how I struggled with keeping them inside the molds. It was too heavy a mixture to have a whole lot of control over. Another vital piece of advice: don’t be cheap and only buy 1 mold. Buy at least 2, preferably 3. This recipe offers enough to fill 2-3 of these molds, so if you only have one, you will be stuck with a big sticky mess to clean up of hardened, wasted candy mixture.


And while mine didn’t turn out as pristine perfect as Martha’s, I really am pleased with the results. It was so much more fun than buying prepackaged candies at the store, and now my mind is spinning with all the fun flavors I could do for lollipops, et al. The flavors I purchased from FancyFlours were really yummy and they smelled amazing when I was making the candy. And it was so inexpensive, too!
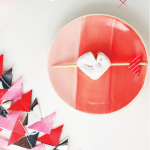
Now, for my favorite part – of course I would have to have great packaging for my little gems! 😉 Using these clear pillow-shaped packaging envelopes that I use for my paperweights, I added a custom-created 2.5″ circular sticker with hand-drawn gems on the top, and then filled ’em up with the candy jewels. I have 3 different colors of the candies: pale pink (cherry), medium red (cinnamon), and scarlet (strawberry).


Jude is Candy Inspector De-Luxe. Yes, those are eggs sitting on the table. He is also the Egg Inspector De-Luxe at our house. He likes to be the helper when I make his scrambled eggs in the morning.
Yes, I cringe as I watch him open the fridge and get the eggs out.
Yes, he has dropped them before.

No eggs were harmed in the making of this Valentine treat.


I hope you enjoyed! Now go make some candy and tell me if you try it!
You might also enjoy:
 Cupid’s Donuts – A Valentine Treat Posted in Celebrations
 Recipe: Weight Watchers protein breakfast Posted in Health
 Valentine’s Day 2014 Posted in Family, Celebrations, DIY


